|
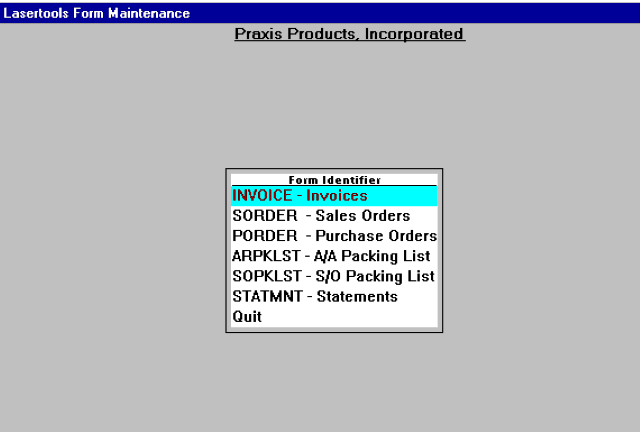
To change the form design, select Form Maintenance from the
Extension Menu in accounts receivable, purchase orders or
sales orders. When selected the choice will be provide on
which type of form to edit, as shown in figure(1).

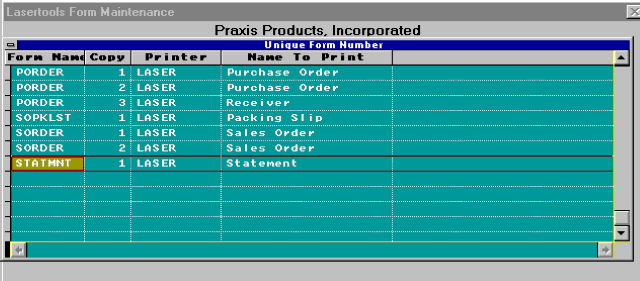
Select one of the types. Once selected, enter the copy number
or blank to list all. The current form information will be
displayed as depicted in figure(2).

Enter Choice (Edit/Del/Fwd/Back/Quit)
Press:
E - Edit the information about this copy of the form.
D - Delete the information for this copy.
F - Forward to the next copy.
B - Back to the last copy.
Q - Quit
Select "E" to edit and the form can be changed as follows:
Form: Cannot edit this block. Information only. Determines
which form to modify.
INVOICE - Invoices
SORDER - Sales Orders
PORDER - Purchase Orders
PAKLIST - Packing Lists
Copy Number: Determines which copy number of the
form is being changed. Cannot alter it from this display.
Form Name to Print: Name of the form to print in
the upper right corner, such as: Purchase Order, Sales Order,
Invoice,etc.
Copy to Information at the bottom of the form: Whatever
is put here will print on the bottom of the form.
Examples:
For Invoices: "Remittance Copy, Please Include with
Payment"
For PO's: "Vendor Original Signature Required________________________"
or "Receiving Copy Received by _______________________"
Show Payments: (Invoice Only) If payments should
be printed on the invoice and deducted from the total due.
HPIII Compatible: Provides capability to print on
some printers that are not HPIII compatible.
Show Logo: Print logo on this copy if available.
Show Price/Cost: Depending on the form. This will
suppress the information for printing.
Show Contact: Prints the contact at the top right
of the form if selected.
Show Phone: Prints phone number at the top right
of the form if selected.
Show Fax Number: Prints fax number at the top right
of the form if selected.
Show Message: Prints the message in the middle of
the header for revised invoices and other exceptions to the
normal printing.
Copy to Position: (Center/Left)
Press:
C - to center the copy to information at the bottom of the
form.
L - to left justify the copy to information.
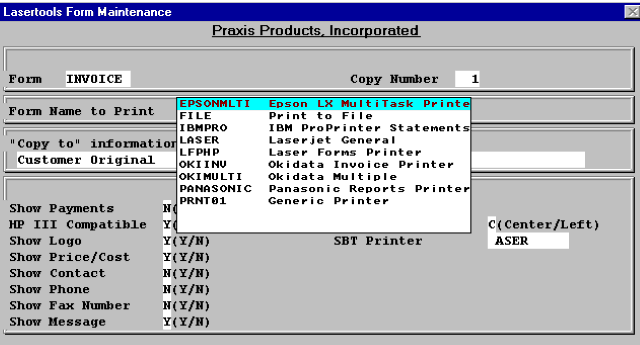
ACCPAC Printer: Enter the printer, or enter partial
and select as depicted in figure(3). Each copy can go to a
different printer if desired. When editing the printer information,
it will be validated against the currently installed printers.
If part of the printer name is entered, or if the name is
entered incorrectly, the selection window in figure(3) will
be displayed. To select a printer, use the arrows or press
to quit without selecting.

Operation: Once installed, all operation is as it was except
the question will be asked if printing on a laser.
Programming: Each of the boxes and lines are described in
the code to make it apparent how they are printed.
- Two functions in the program TOLASR.PRG are used for
most of the printed lines:
PROCEDURE LPSAY
line = lpsay(text,fontname,line,column,scale,orientation)
TEXT - What to print
FONTNAME - font name to use (set up in lpfntset)
LINE - line to print it on
COLUMN - column to start the print
SCALE - inches or rows
ORIENTATION - portrait or other structure
PROCEDURE LPBOX
DO LPBOX WITH TOPLINE, LEFTCOL, BOTTOMLINE, RIGHTCOL,
SHADING, LINETHICK, TYPE, SHADOW, TYPEP, LNCOLOR, BOXPAT
TOPLINE - The top line of the box (row)
LEFTCOL - Left column of box
BOTTOMLINE - bottom line or row
RIGHTCOL - Right column
SHADING - shading on the inside
LINETHICK - thickness of the line
DBL - not used
SHADOW - shadow around box
TYPEP - rows or inches
LNCOLOR - line color
BOXPAT - pattern to make the box from
Other Programs:
PROCEDURE P0cpname
Includes the copy names to print on the bottom of the
forms. Names can be changed as desired in this program.
To provide additional copy names, just add more lines.
PROCEDURE lpfntset
Provides the font setups. The fonts can be changed in
many different ways, from altering which font is used,
to the way it shows on the forms.
(toolbox:ltdocs:8-26-94) 6
|